My name is Kitty and I am addicted to Makeup Revolution. Third was my third order, and it certainly won't be my last! This time I had a very specific item I wanted to order in basically every colour option I could, the velvet matte lip lacquer. It has very quickly become my favourite lip product ever and I can't resist them.

I maybe kind of ordered a few.... I ordered a variety of different colours including some that were quite 'out there' for me.

L-R
A Love Like That
Depravity
I Fall in Love
No Ordinary Love
What I Believe
All That I Have Inside
Barely There
More Than I Could Give
I just love the names!

The swatch left to right matches the order of the photos above. So the first thing to note is that I'm kind of an idiot. I assumed that all the products called a lip lacquer were matte, they are not! The velvet ones are matte, and the intense ones are a gloss. So I ordered these expecting all matte and they aren't, totally my own fault! Most of the shades actually come in both a velvet and intense finish, so do pay more attention that I did when I placed this order. A Love Like That, All That I Have Inside, More Than I Could Give are both actually the gloss versions, which is why they swatch totally differently to the others. I also resolve to do much bigger swatches in the inevitable next Makeup Revolution haul I do!

This is I Fall in Love, super bright pink and awesome staying power.


Depravity! I think this might be a good dupe for Jeffree Star's Blow Pony. So different and fun. I wore this look on just a regular day, because why not! I basically plan on treating the lip lacquers like Pokemon and will collect them all! For £3 each I can't resist.

I ordered a couple of others bits too, including the Awesome Metals Eye Foils in Rose Gold.

These are a really unusual product. They come with a little silver dish that you mix the foil in with the liquid and it applies so brightly and stay so well.

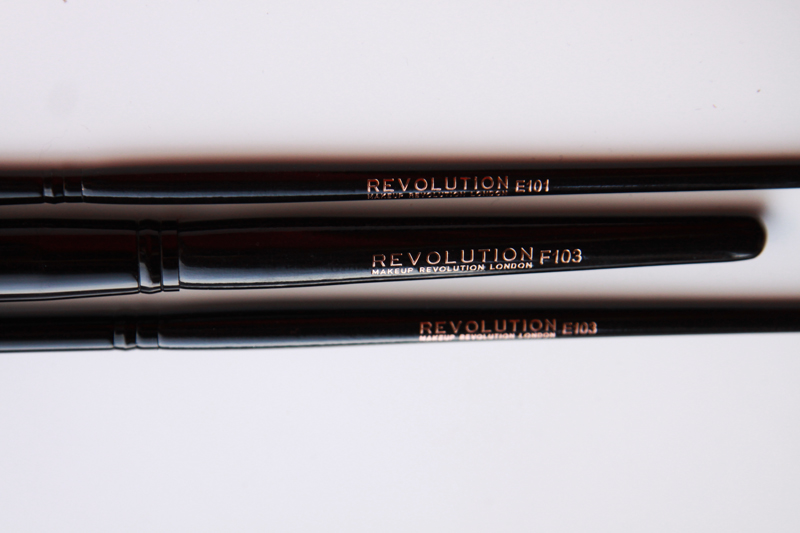
L-R
Pro E103 Eyeshadow Blending Brush
Pro F103 Stippling Brush
Pro E101 Eyeshadow Brush
Cruelty free, fur free brushes can be hard to come by, and these are really soft.

I've wanted to try a stripping brush for foundation for a while, I don't wear it often but I'm trying to be better at makeup and good brushes seemed like a good place to start.
What are your favourite Makeup Revolution products?
Much love,
Kitty
xxxxxx